Disposable Video Laryngoscope — ABS Redesign & Self-Cleaning Lens
Industry:
Role & Scope:
Tools & Methods:
.png)
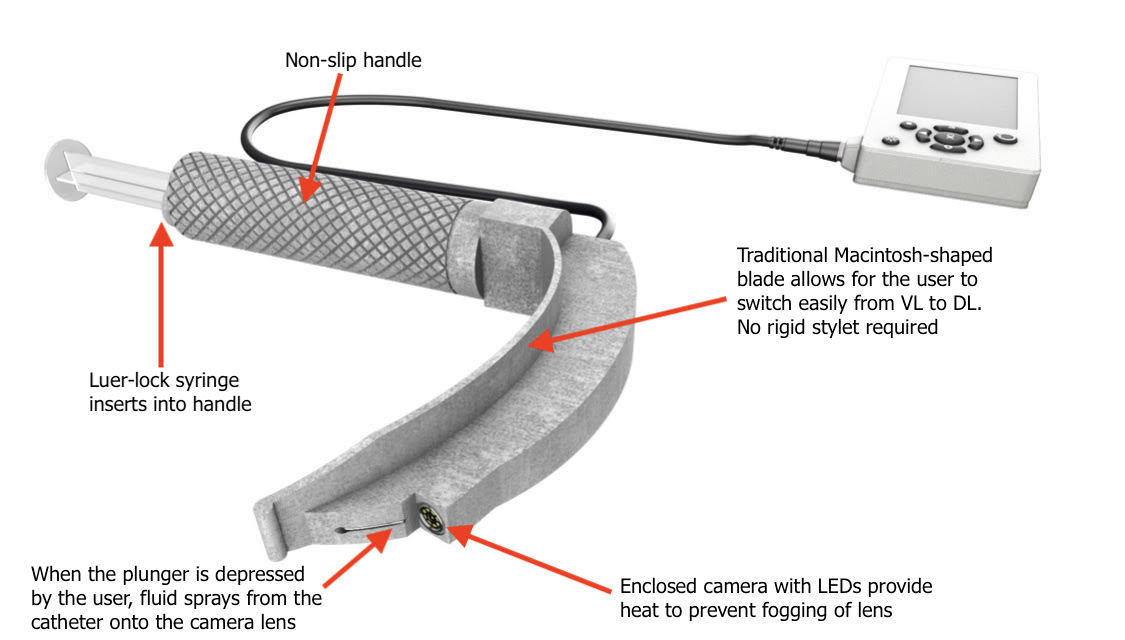
Key features:
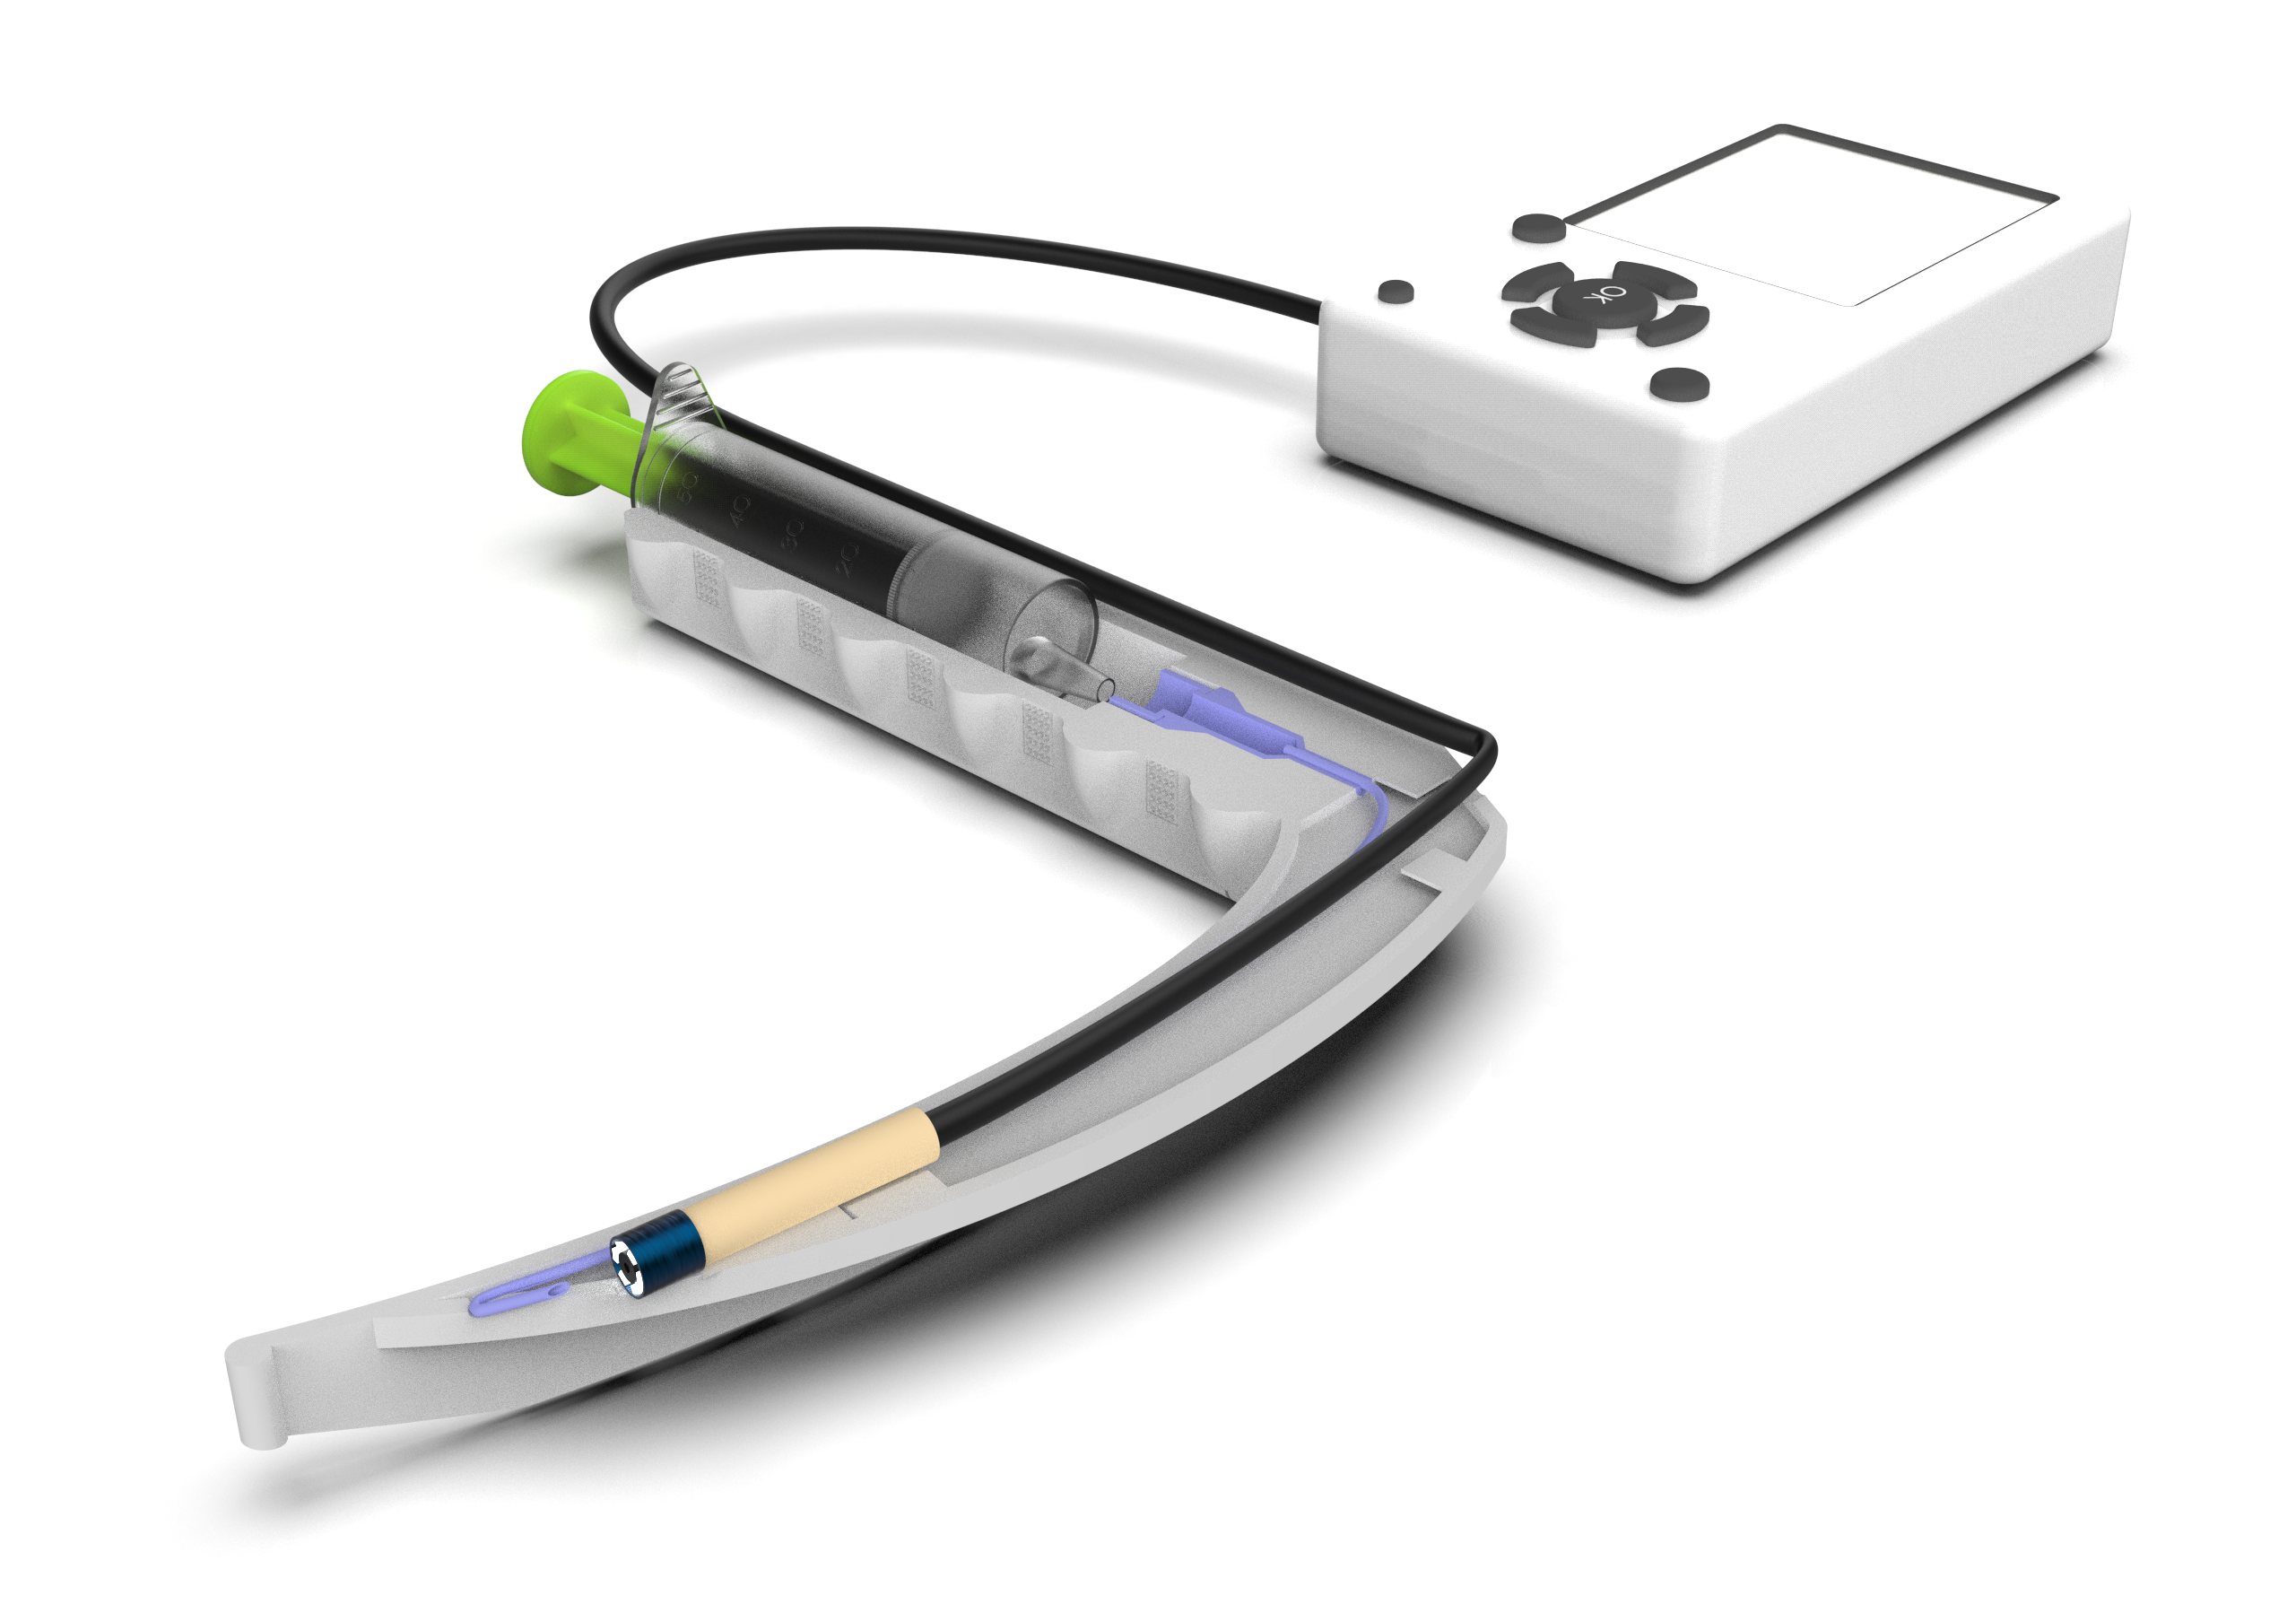
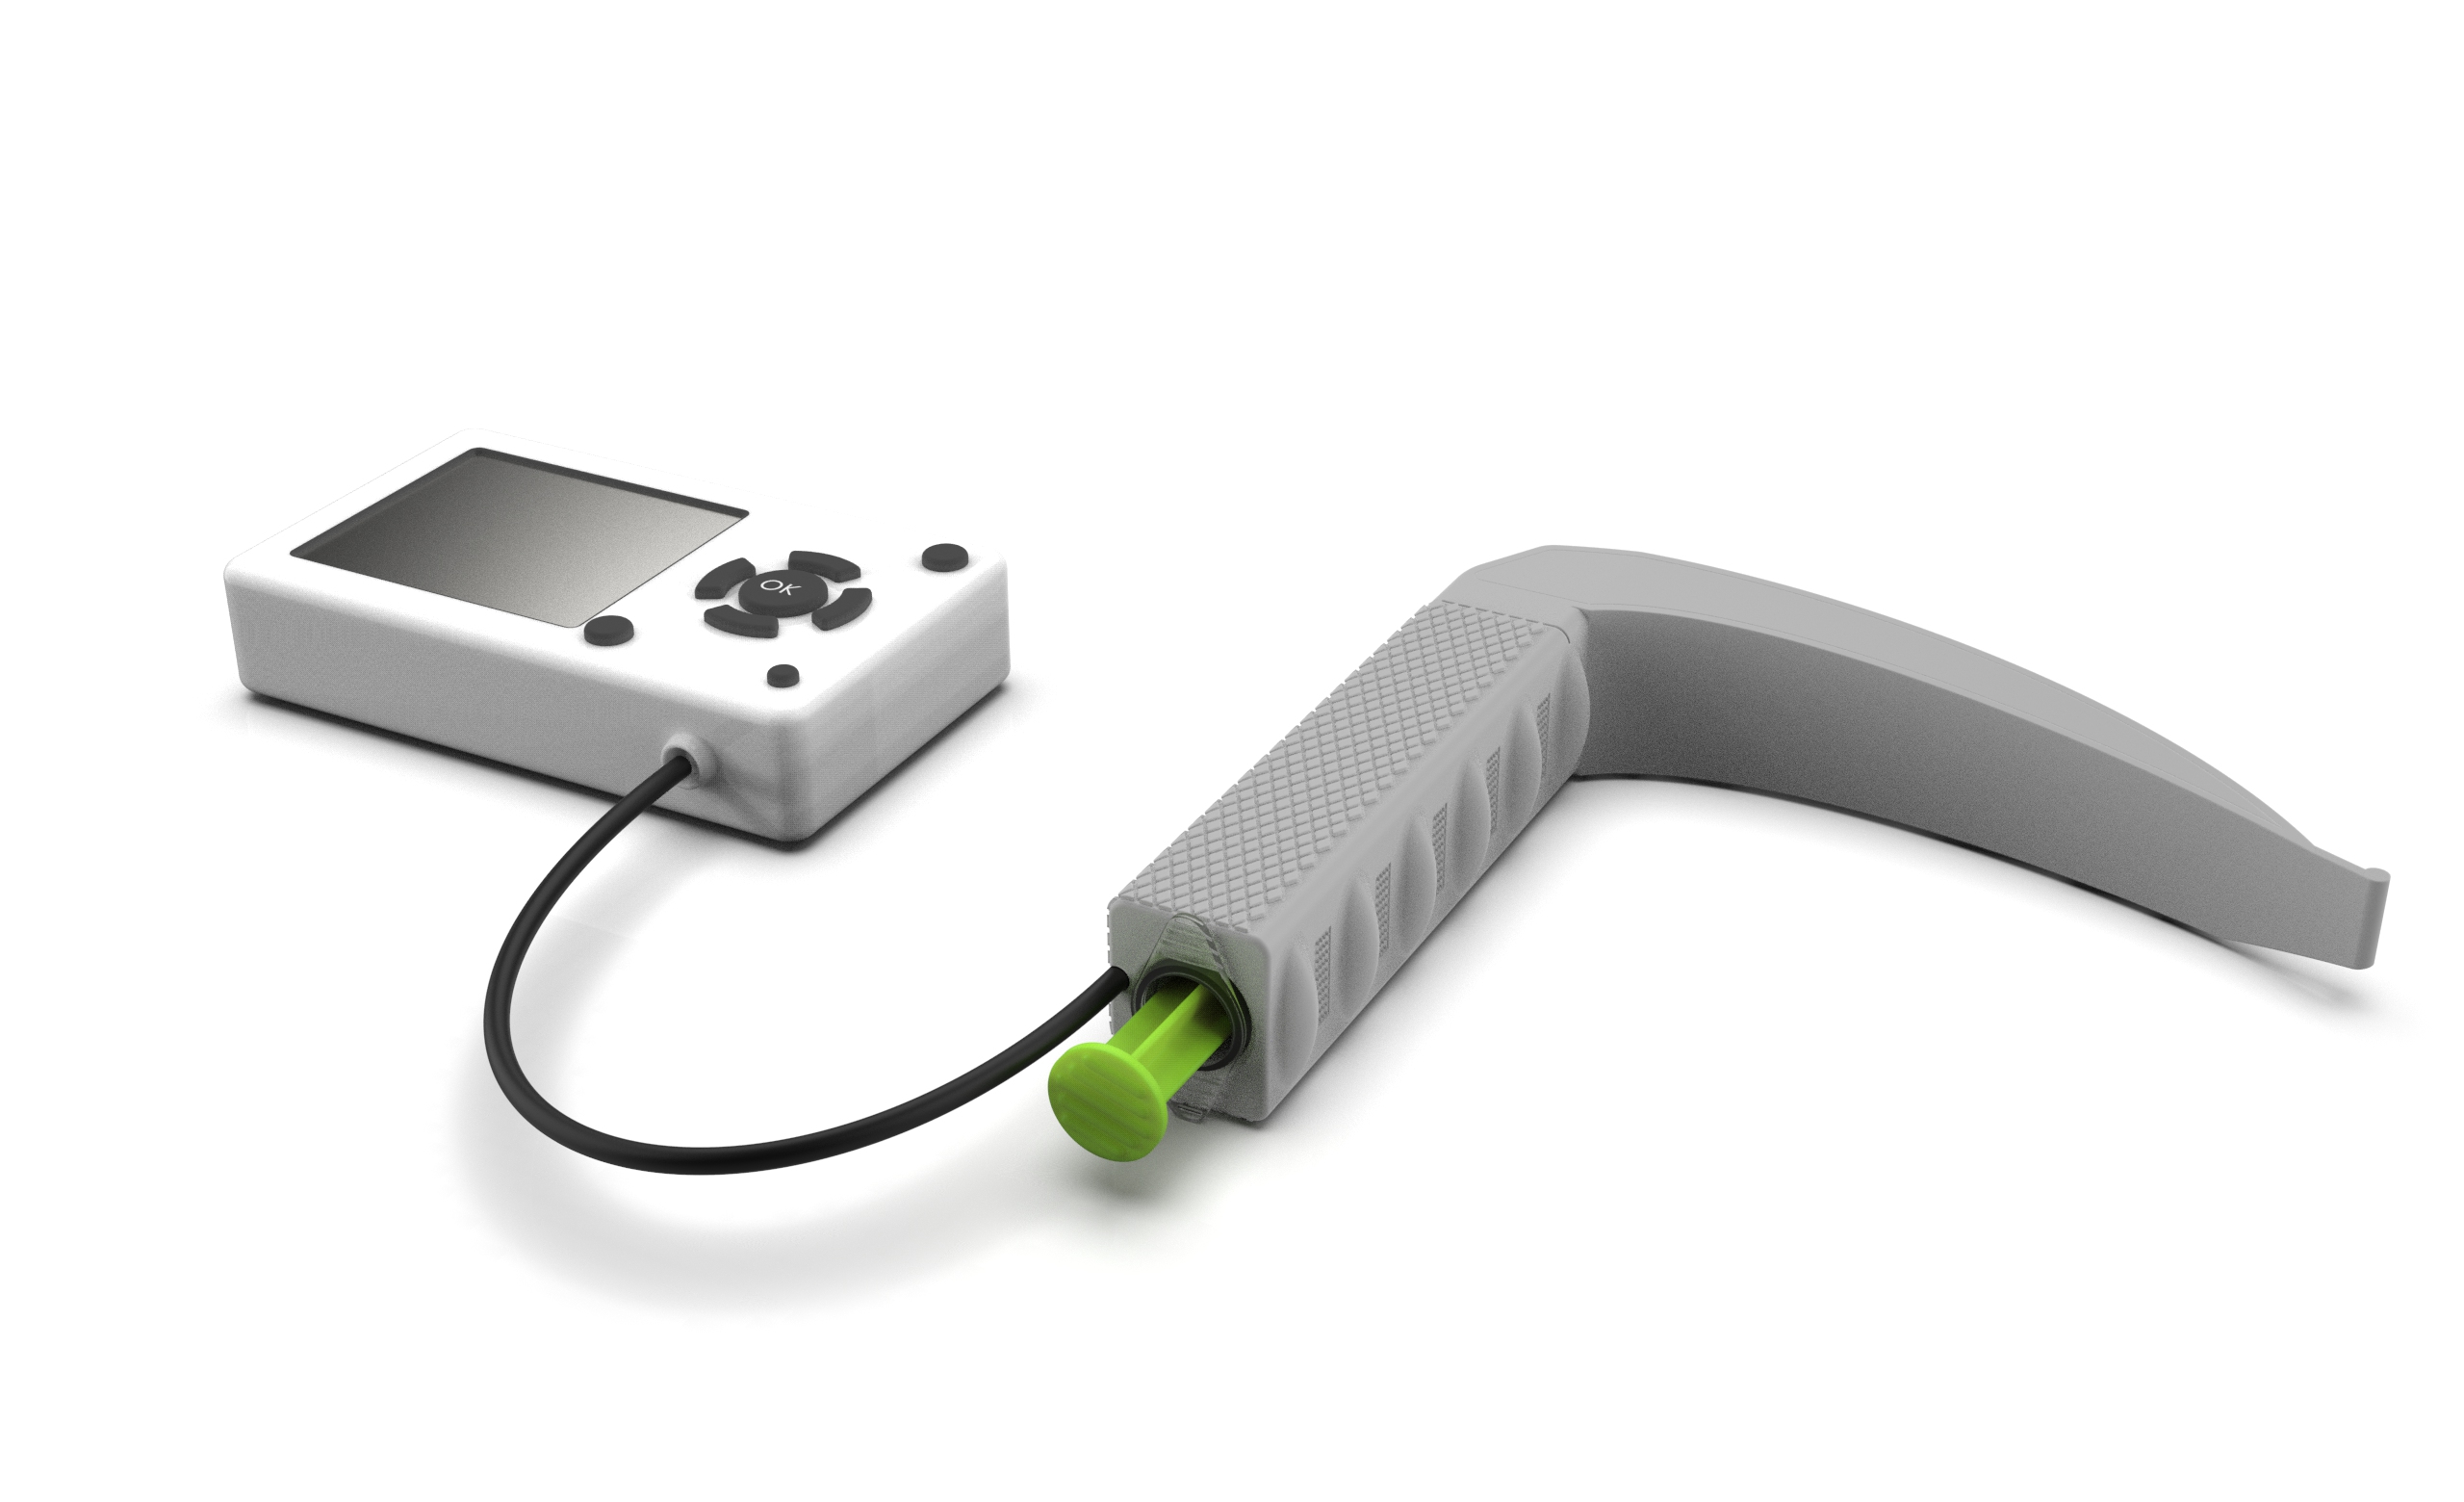
- Self-cleaning camera lens using syringe-driven fluid delivery
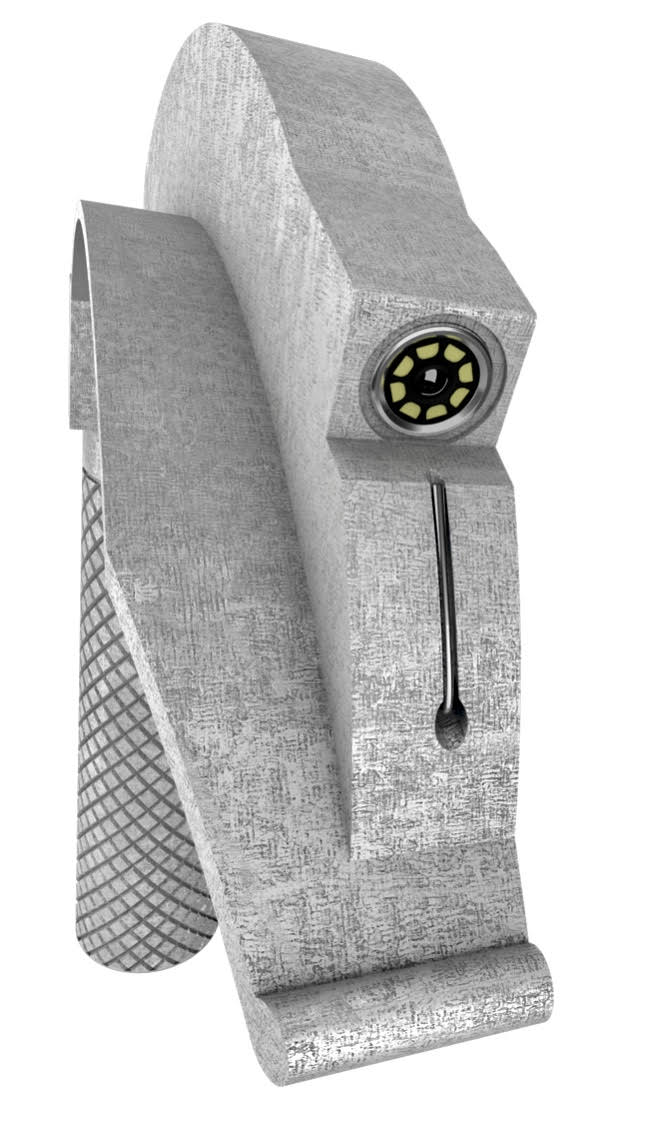
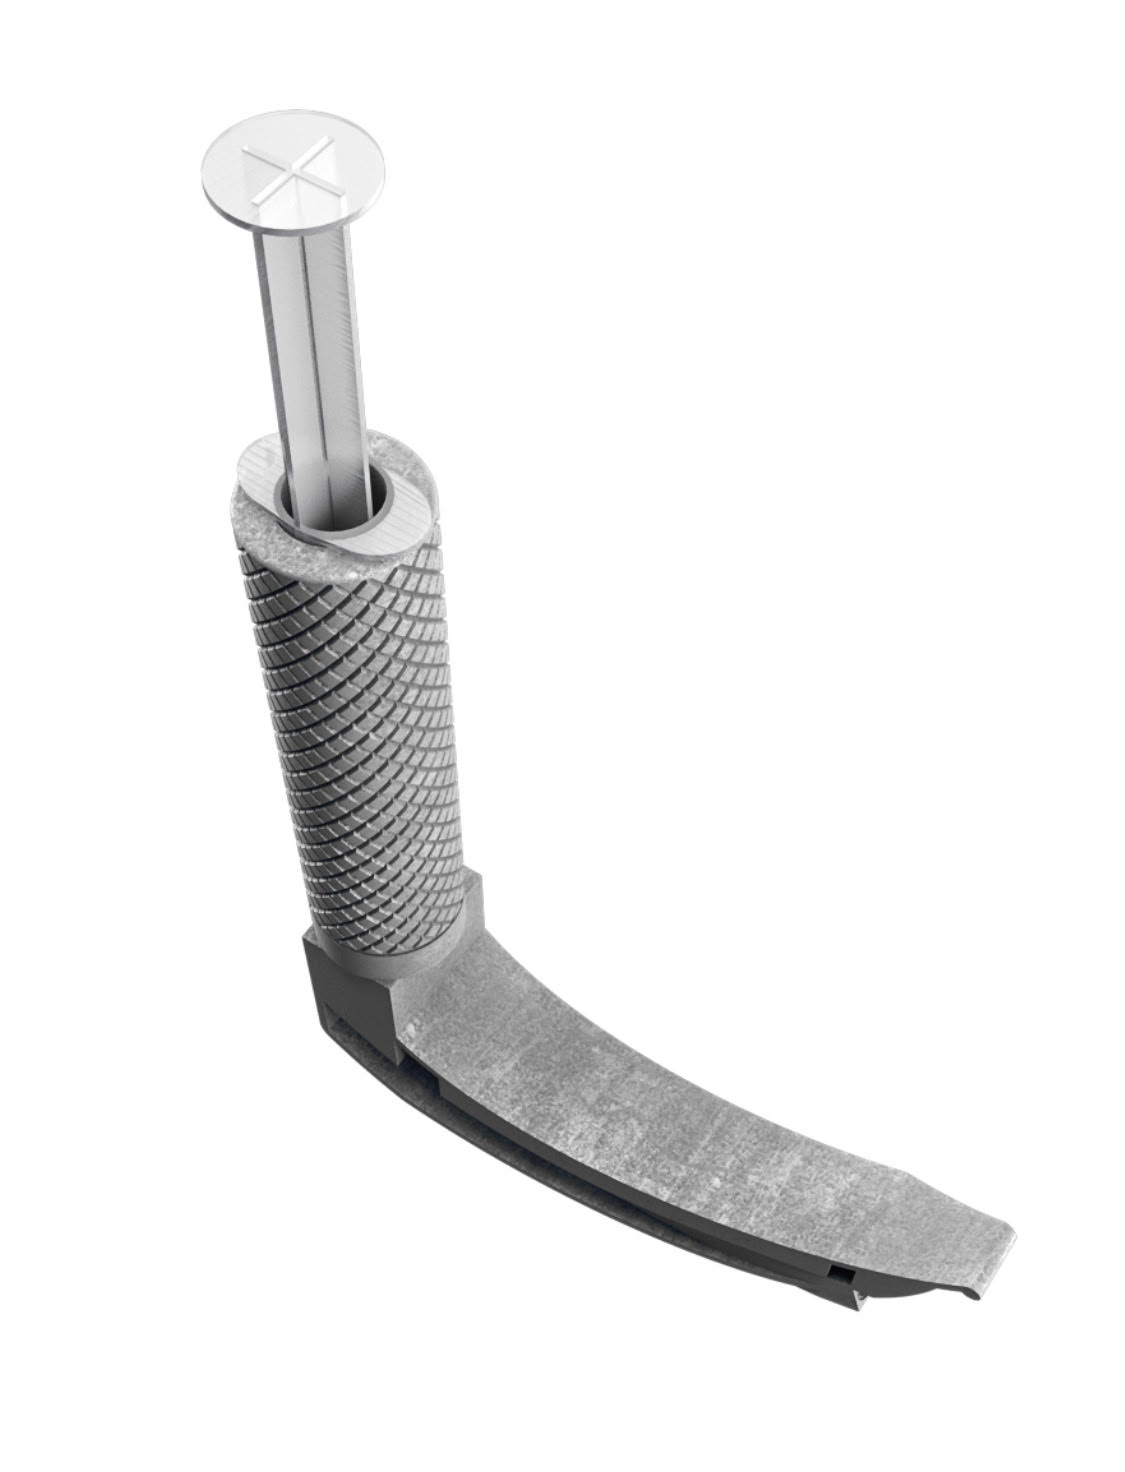
- Integrated camera and LED housing
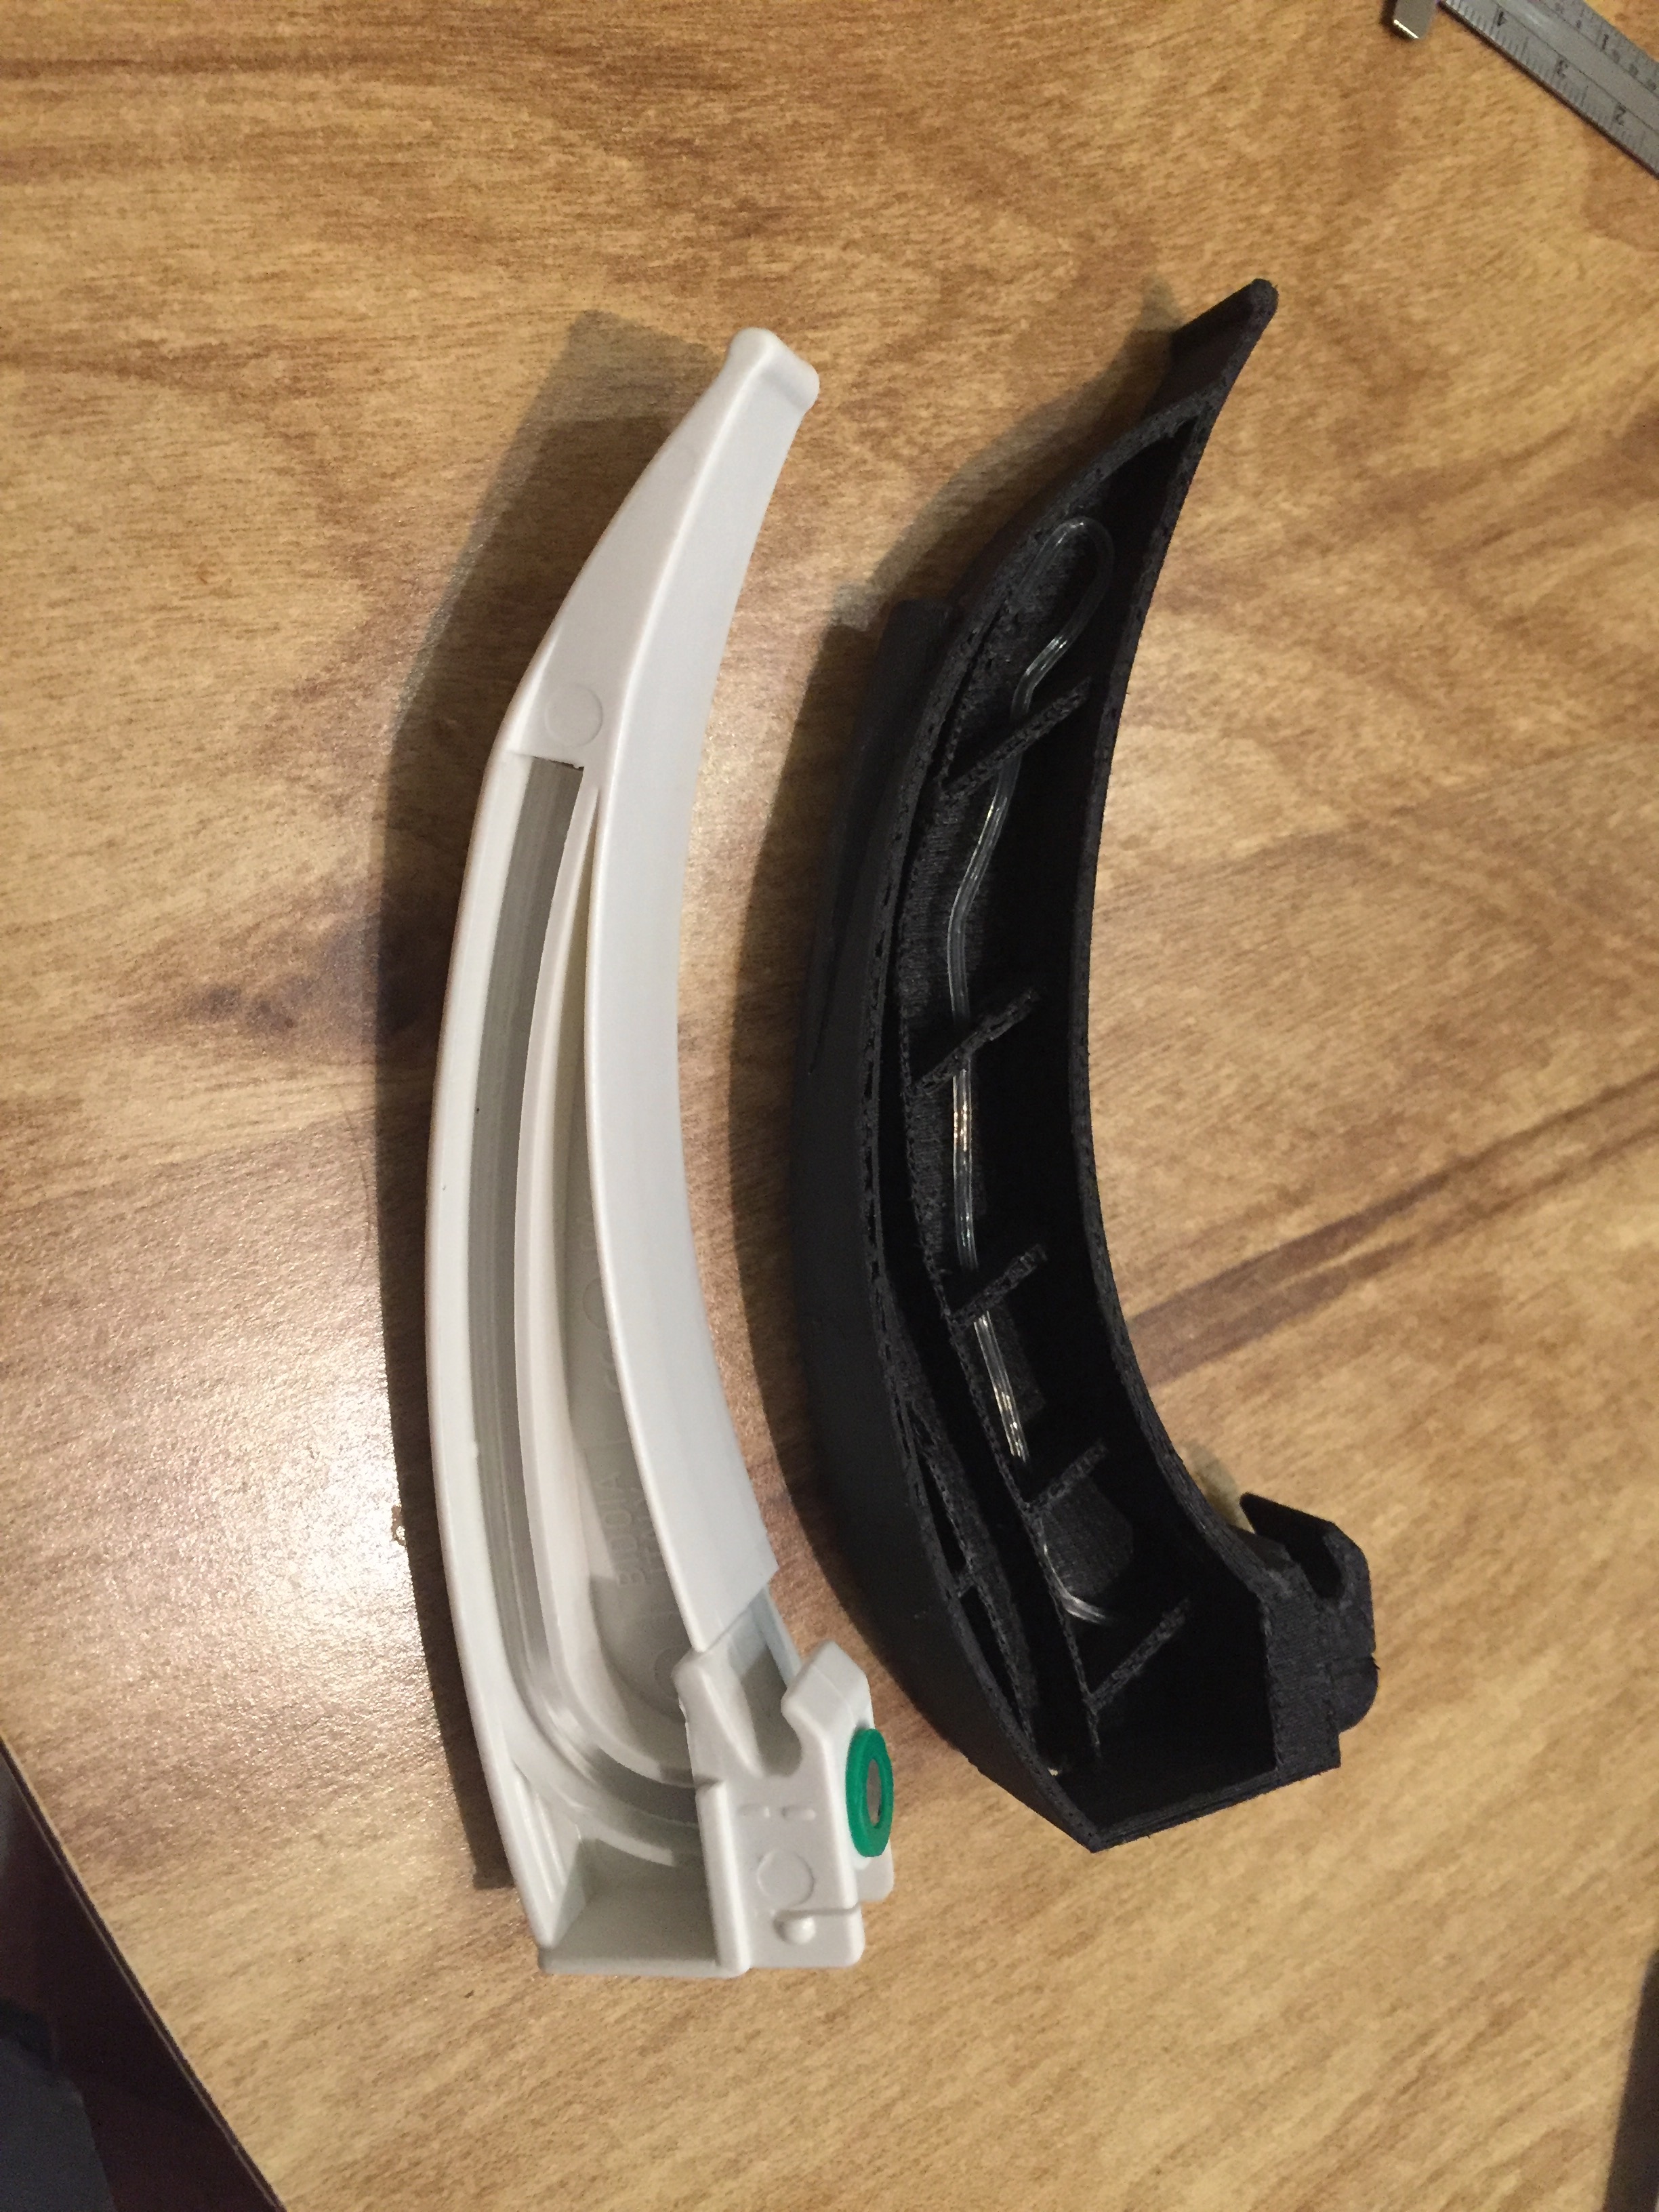
- Catheter routing channel optimized for tight curvature
- Reinforced ABS structure suitable for disposable use
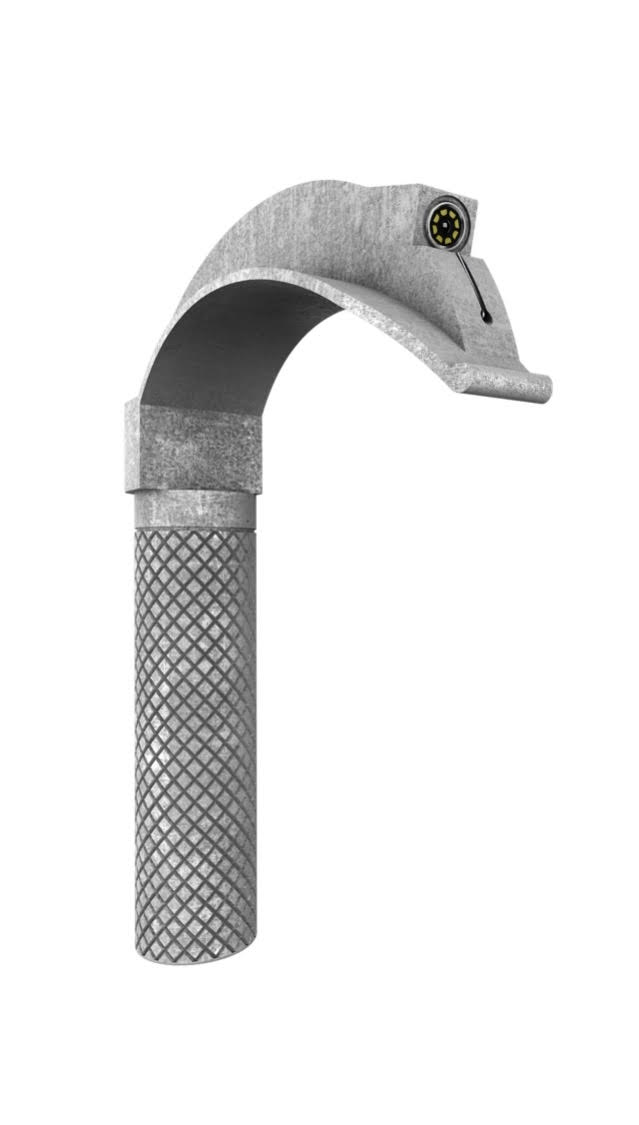
- Non-slip ergonomic handle texture
The Challenge:
The original geometry was reworked extensively in SolidWorks to address material limitations, internal routing, and multi-size scalability
The redesign had to balance clinical usability, camera visibility, internal fluid routing, and low-cost disposable manufacturing constraints simultaneously.
Key constraints:
- Disposable ABS manufacturing
- Rigid camera tip length limitations
- Multiple blade sizes with consistent behavior
- Clinical usability and orientation feedback
Outcome:
The final designs delivered:
- A structurally reinforced ABS laryngoscope suitable for disposable use
- Smooth camera and catheter insertion across multiple blade sizes
- A functional self-cleaning camera lens system activated via syringe
- Geometry compliant with 3D-printing constraints and rapid prototyping
- High-quality renders used for product visualization and marketing
The device progressed to physical prototypes, external testing, and early demo units, supporting continued development toward manufacturing.
What this project demonstrates:
- Medical device redesign under real constraints
- Plastic-first structural engineering
- Mechanical + fluid system integration
- User-feedback-driven iteration
- Prototype-to-manufacturing readiness
Process & Key decisions:
Material-Driven Redesign
The original geometry relied on metal stiffness.
The design was re-engineered with plastic-first logic, adjusting wall thickness, curvature, and internal features to prevent flex and breakage.
Camera Path Optimization
The rigid camera tip length proved more limiting than its diameter.
To resolve jamming and excessive curvature:
- The internal channel was straightened where possible
- Blade curvature was carefully adjusted within clinical limits
- In later iterations, side-insertion of the camera was explored to unlock better angles
Design Constraints & Trade-offs
Add this after Camera Path Optimization:
Design Constraints & Trade-offs
- Camera aperture angle vs blade tip visibility
- Internal channel straightness vs anatomical curvature
- Wall thickness for ABS strength vs overall blade profile
- Disposable cost targets vs multi-part assemblies
Each iteration required conscious trade-offs rather than “perfect” geometry.
Self-Cleaning Lens System
During testing, fluid and debris were observed collecting near the camera lens.
A luer-lock syringe interface was integrated into the handle, routing fluid internally and expelling it near the lens when the plunger is pressed, allowing the user to clear the view without removing the device.
User Feedback Integration
Feedback from clinical testing revealed that users felt “lost in space” when the blade tip was not visible in the camera view.
The camera angle was adjusted intentionally so a portion of the blade tip remains visible, improving spatial orientation without sacrificing field of view.
Iterative Scaling
One blade size was fully resolved first, then systematically adapted to other sizes, ensuring that scaling did not reintroduce camera or catheter issues.

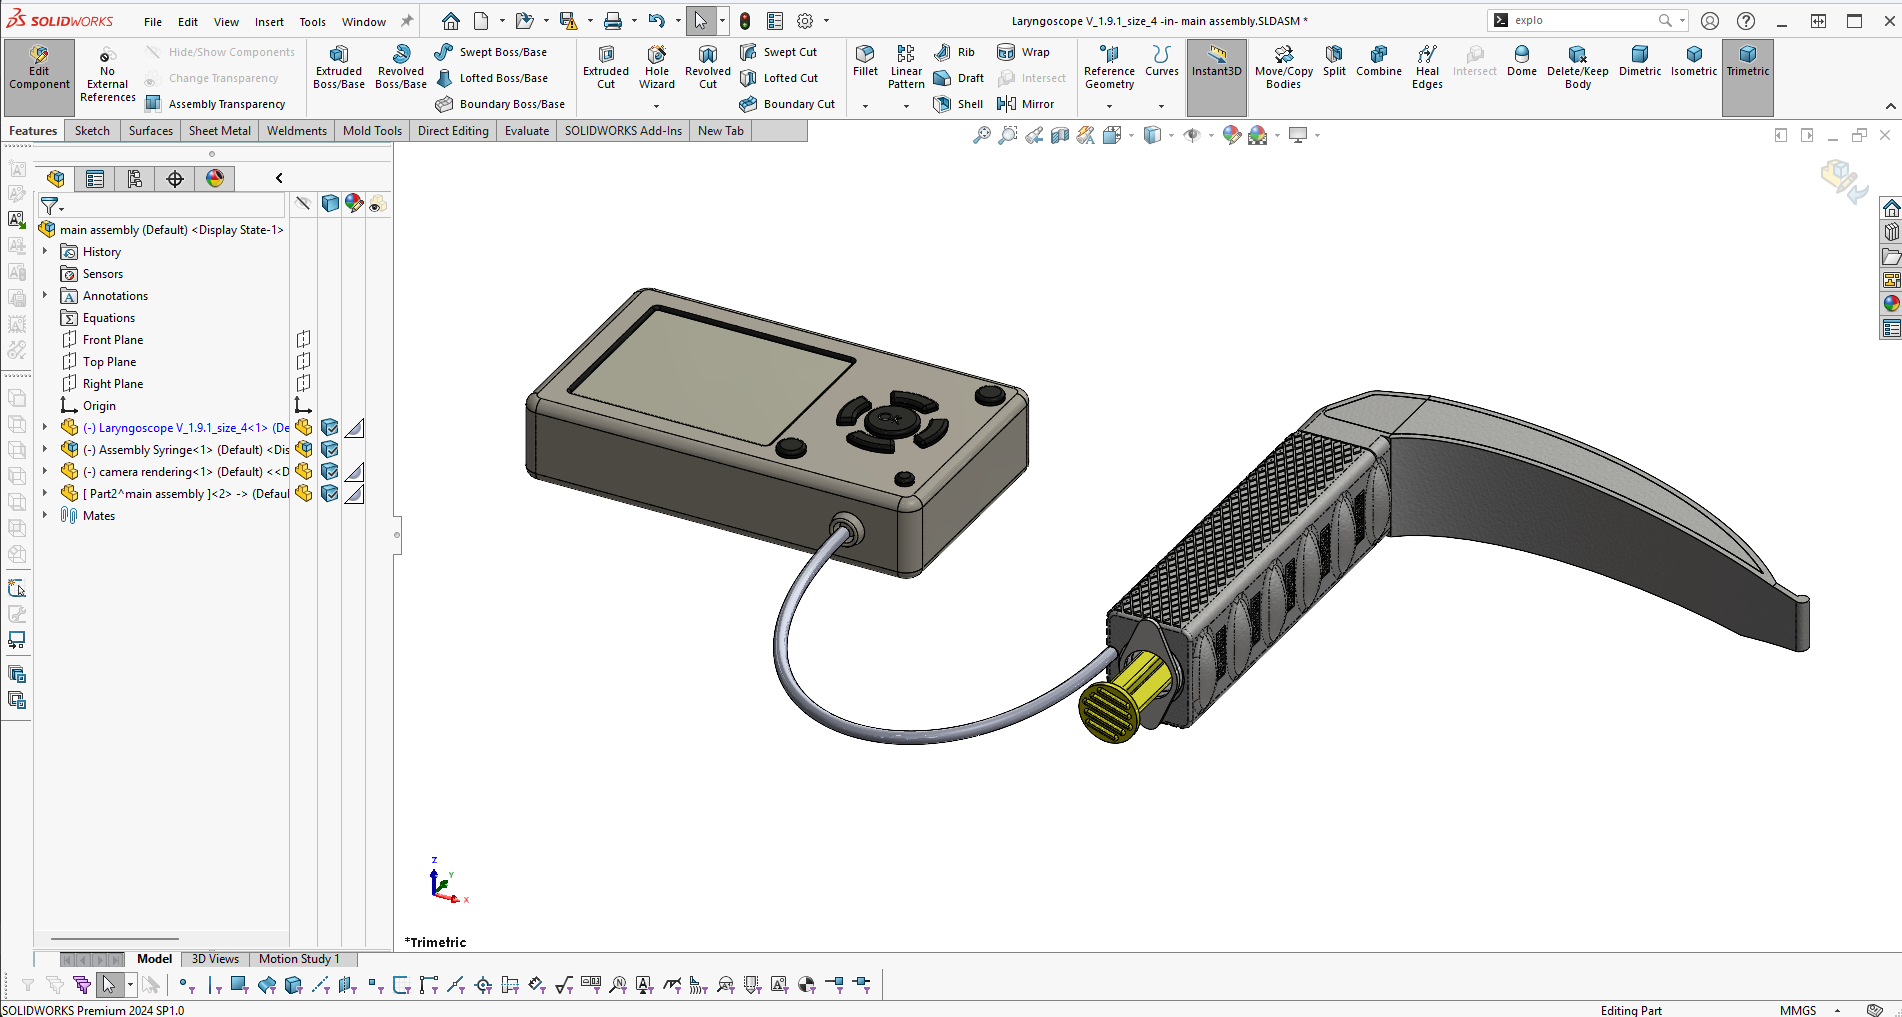
CAD Development & Engineering Proof: